Table Of Content

In my blog, I share tips and tricks for woodworkers of all skill levels, as well as project ideas that you can try yourself. It’s important to choose a piece of wood that is free from knots or imperfections that could weaken its structure. In international competition, a world cup is held every second year.[32] As of 2017[update], teams from Germany and the United States dominated international competition.
Step 6: Start Sanding!
As the wing rotates and the boomerang moves through the air, the airflow over the wings creates lift on both "wings". Traditionally, most boomerangs used by Aboriginal groups in Australia were non-returning. They are typically much larger than boomerangs, and can travel very long distances; due to their size and hook shapes, they can cripple or kill an animal or human opponent. The word is perhaps an English corruption of a word meaning "boomerang" taken from one of the Western Desert languages, for example, the Warlpiri word "karli". Boomerangs can be made for right- or left-handed throwers. The difference between right and left is subtle, the planform is the same but the leading edges of the aerofoil sections are reversed.
boomerang-shaped body & off-road capabilities define artem smirnov's EV concept - Designboom
boomerang-shaped body & off-road capabilities define artem smirnov's EV concept.
Posted: Wed, 10 Aug 2022 07:00:00 GMT [source]
How to Build and Throw Your Own Boomerang
The leading edge angle should be about 40 to 45° and the trailing edge angle is more like 20 to 30°. The classic boomerang's propeller axis is only imaginary, so it obviously isn't attached to anything, but the propeller itself is moved by the forward force of the wings' lift. It would be reasonable to assume, then, that a boomerang would simply fly off in one direction as it spun, just as a plane with a spinning propeller will move in one direction.
Step 3: Add Wing Profiles
The foil should slightly wrap around the end of the boomerang (As pictured). The most important part of the boomerang is the design of the foils. Depending on how these are formed will directly affect the flight path of the boomerang.1. With a pencil, sketch the foils on the top surface of the boomerang (As shown in the photograph).2. For right-handed users the sketch should be as shown with the end that will be held having the foil on the inside.3. If left-handed, just draw your foils in the mirror image.4.
To move a vehicle like a plane or helicopter, you just attach it to this axis. After completing your boomerang it is time to throw it. There is a throwing style that will allow you to be successful. The photos will be demonstrating the method for right-handed throwers.
Step 9: Throwing Your Boomerang
Science of Boomerangs: How to Make & Throw the Aussie Magic - Popular Mechanics
Science of Boomerangs: How to Make & Throw the Aussie Magic.
Posted: Wed, 30 Sep 2009 07:00:00 GMT [source]
The wheel will turn to the left or right, as if there were a force acting on the front of the wheel. This is because with a spinning object, the point you push isn't stationary, it's rotating around an axis! You applied the force to a point at the top of the wheel, but that point immediately moved around to the front of the wheel while it was still feeling the force you applied. There's a sort of delayed reaction, and the force actually has the strongest effect on the object about 90 degrees off from where it was first applied. The unknown maker carved grooves into the top and bottom, shaving off a tiny bit of weight (crucial in a sport where the mass of a paper clip can clinch a record throw).
How Boomerangs Work
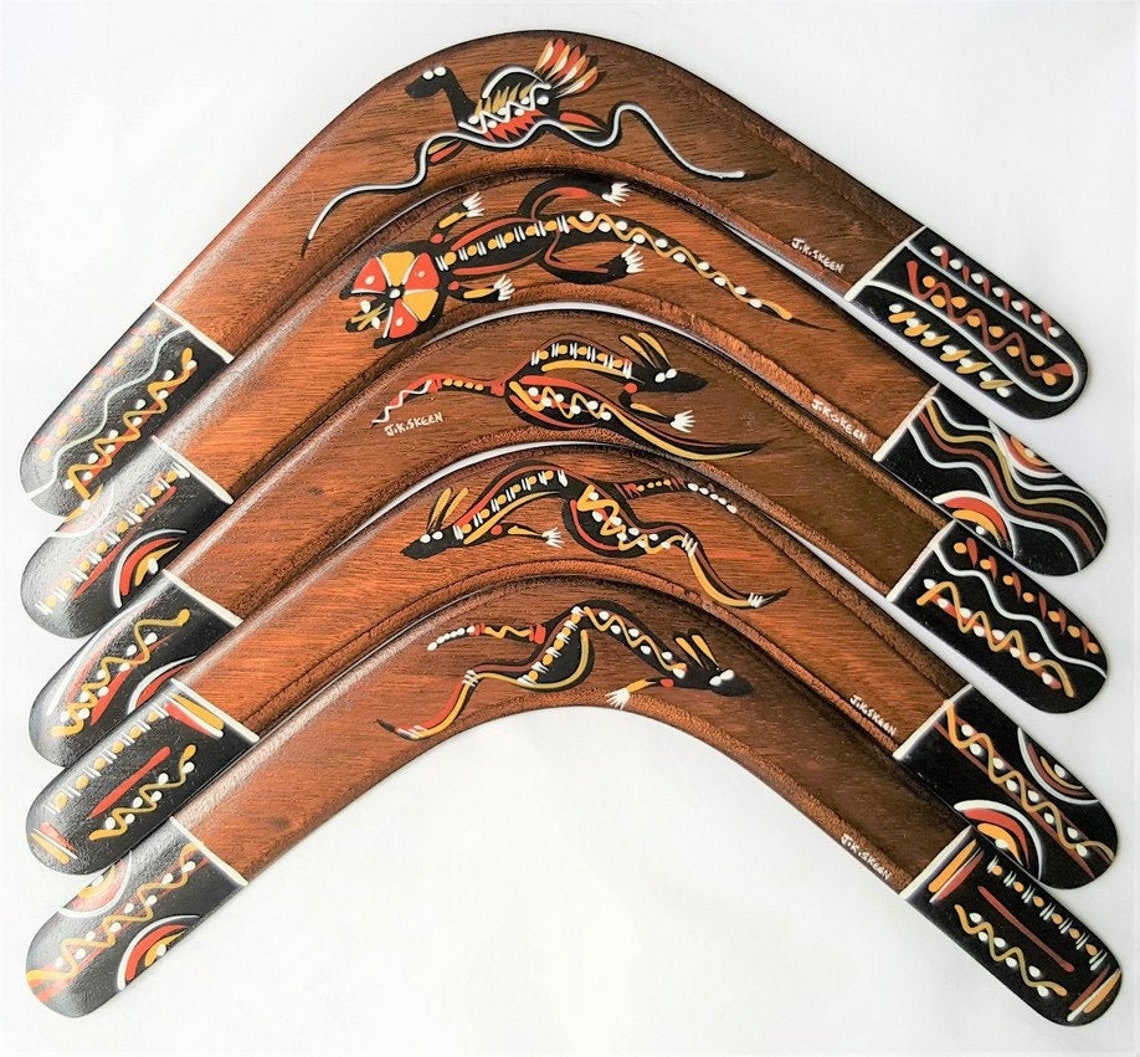
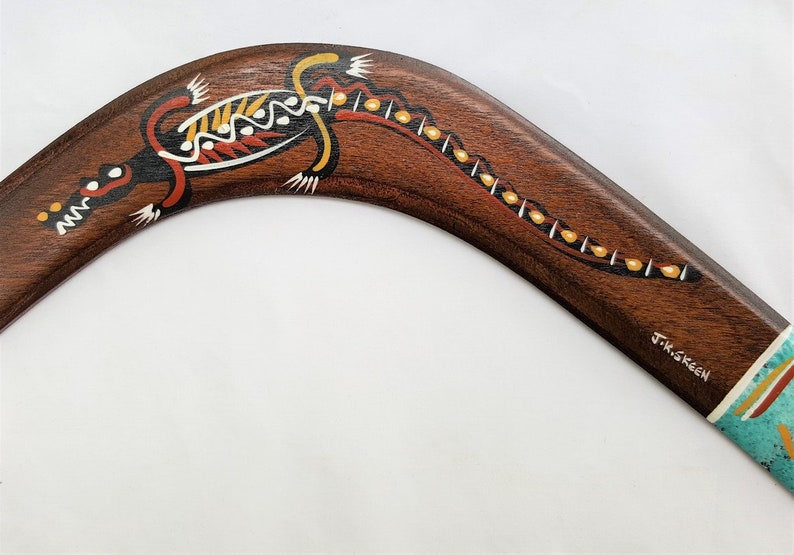
The use of modern thin plywoods and synthetic plastics have greatly contributed to their success. Designs are very diverse and can range from animal inspired forms, humorous themes, complex calligraphic and symbolic shapes, to the purely abstract. Some boomerangs made primarily as art objects do not have the required aerodynamic properties to return.
You will want to choose a strong and durable type of wood that can withstand the force of being thrown. When making a boomerang woodworking, there are several tools that you will need to have on hand. Some of the essential tools include a saw for cutting the wood, a sander for smoothing out the edges, and a ruler or measuring tape for ensuring accurate design and measurement. Additionally, you will need clamps to hold the wood in place while you work on it, as well as carving tools for shaping the boomerang. A boomerang woodworking is a handmade wooden version of the traditional boomerang, known for its unique flight pattern and aerodynamic design.
Removing too much wood can't be undone, so work in a progressive manner. As a general rule, don't go further than half the wood thickness for the leading edge, and don't remove more than 2/3 of the material from the trailing edge. For example, with a 6 mm thick sheet, don't go further than 3 mm for leading edge and leave about 2 mm for trailing edge. If the trailing edge is too sharp, the boomerang will fly unpredictably.
This will help it to penetrate the air and come back to you. If it wants to do an extra loop, you probably threw it too hard. Harder means faster spin - it doesn't necessarily mean a longer flight.
The majority of tools used in creating this boomerang are interchangeable, so fear not! If you don't have access to power tools, hand tools can easily be used instead. If you've ever steered a bicycle without using the handlebars, you've experienced this effect. But constantly pushing on the top of the wheel would keep a steady force acting on the front of the wheel. This force would be stronger than the counterbalancing forces, so the wheel would keep turning, traveling in a circle. Tri-Fly is Darnell's most popular -- and most imitated -- boomerang.
To start with, though, you'll have to establish the shape. To do this, use a template or 'master' to trace around. Simply grab a pen and mark out the outline of your boomerang. If there is a natural bend to your material (be it foam, plastic or plywood), have the material curve upwards to create a natural dihedral to the wings. To start with, we recommend that you keep it simple by using plywood. Foam board will also work as it is super easy to work with but it will not last long.
It’s important to note that different types of wood may require varying techniques for cutting and shaping. For example, hardwoods like oak or ash may be more difficult to cut than softer woods like pine or cedar. Additionally, factors such as grain direction and density can impact how easily a particular type of wood can be shaped. Ultimately, choosing the right wood will play a significant role in the success of your boomerang woodworking project. Ash is valued for its flexibility and shock absorbance, making it suitable for creating boomerangs with a bit more give in their flight. Aircraft grade birch plywood is a top pick for professional-grade competition boomerangs due to its precision cutting capabilities and consistent performance.
Those weak spots will make your boomerang break easily. We'll also delve a little into the history of boomerangs to see how they came about in the first place. Boomeranging is an amazing demonstration of scientific principles as well as a terrific sport you can enjoy all by yourself. The wings' positive angle of attack allows the boomerang to climb farther and faster. It's made from a type of polypropylene plastic soft enough for the user to bend the wings further, yet resistant enough to hold the resulting shape -- making this the first "tuneable" boomerang. With just a few tools and a short amount of time you can be out throwing your very own boomerang.


No comments:
Post a Comment